Wooden Blanket Chest Plans: Effortless DIY Guide
Add a touch of charm and functionality to your living space with an effortless DIY wooden blanket chest. Dive into our detailed guide and learn how to create your own beautiful storage solution that will elevate your decor.
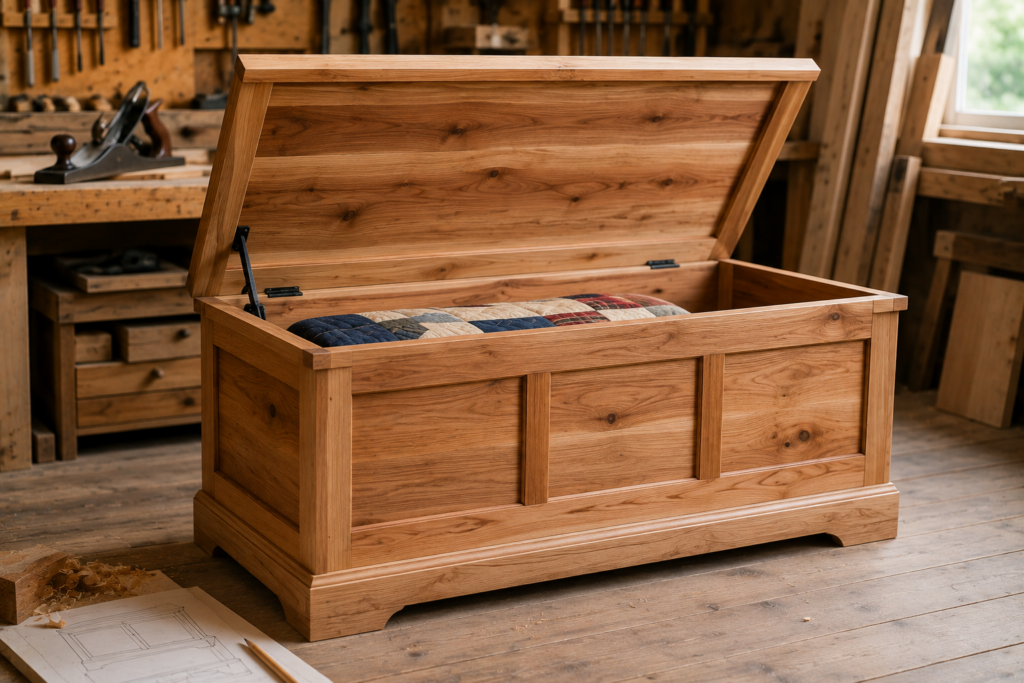
Woodworking enthusiasts looking to add a touch of charm and functionality to their living space often turn to DIY projects. One popular and rewarding woodworking project is building a wooden blanket chest. Blanket chests not only provide valuable storage space for blankets, linens, and other items but also serve as a beautiful decorative piece in any home. In this article, we will explore the process of creating your own DIY wooden blanket chest with detailed plans and instructions.
Planning Your DIY Wooden Blanket Chest
Before you embark on your woodworking adventure, it is important to have a solid plan in place. Start by deciding on the size and design of your blanket chest. Consider the space where you plan to place the chest and determine the dimensions accordingly. You can choose from various styles, such as traditional, modern, or rustic, depending on your personal taste and existing decor.
Materials and Tools You Will Need
To build a wooden blanket chest, you will need a few essential materials and tools. Gather high-quality wood boards, such as pine or cedar, for the chest’s construction. Additionally, you will need wood glue, screws, sandpaper, wood finish, a saw, a drill, and a measuring tape. Investing in good-quality materials and tools will ensure that your blanket chest turns out sturdy and visually appealing.
Step-by-Step Construction Guide
- Cutting the Wood: Start by cutting the wood boards to the desired dimensions for the sides, top, bottom, and lid of the chest. Ensure that the cuts are precise and clean for a professional finish.
- Assembling the Frame: Use wood glue and screws to assemble the frame of the chest. Pay attention to the joints and ensure they are strong and secure.
- Adding the Lid: Attach the lid to the chest using hinges to allow for easy opening and closing. Consider adding a lid support mechanism to prevent it from slamming shut.
- Finishing Touches: Sand the entire chest to smooth out any rough edges or surfaces. Apply a wood finish of your choice to enhance the natural beauty of the wood and protect it from damage.
Personalization and Customization
One of the best aspects of DIY projects is the ability to personalize and customize the final product according to your preferences. You can add decorative elements like carvings, engravings, or even a painted design to make your blanket chest unique. Consider adding handles or knobs for easy opening and a touch of elegance.
Benefits of Building Your Own Blanket Chest
Building your own wooden blanket chest offers a range of benefits beyond just having a beautiful piece of furniture. DIY projects like this allow you to hone your woodworking skills, unleash your creativity, and create a lasting piece that you can be proud of. Additionally, handmade furniture often carries sentimental value and becomes a cherished heirloom in your family.
Conclusion
In conclusion, constructing a DIY wooden blanket chest is a rewarding and enjoyable woodworking project that allows you to showcase your craftsmanship and creativity. By following the detailed plans and instructions provided, you can create a stunning and functional piece of furniture that will enhance the aesthetic appeal of your home. Start your woodworking journey today and build a timeless masterpiece that will be treasured for years to come.