Wood Filler Secrets: Master Pro Techniques
Learn the insider wood filler techniques that will take your woodworking projects to the next level. Mastering these wood filler techniques will transform imperfections into seamless finishes with professional results.
Wood filler is a versatile product that can be a real lifesaver when it comes to woodworking projects. Whether you are filling in gaps, cracks, or holes in your woodwork or looking to create a seamless finish, knowing how to use wood filler like a pro can make a significant difference in the quality of your final product. In this article, we will explore tips and techniques to ensure you are using wood filler effectively and achieving professional results.
Understanding Wood Filler
Before diving into how to use wood filler effectively, it’s essential to understand what wood filler is. Wood filler is a putty-like substance that is used to fill imperfections in wood surfaces. It is typically made of wood dust or wood fibers combined with a binding agent, such as epoxy or latex. Wood filler comes in a variety of colors to match different wood types, making it easy to create a seamless finish.
Choosing the Right Wood Filler
One of the key aspects of using wood filler like a pro is selecting the right product for your project. Consider the type of wood you are working with, the size of the imperfection you need to fill, and the final finish you are aiming for. Some wood fillers are designed for interior use only, while others are suitable for both interior and exterior applications. Make sure to choose a high-quality wood filler that will bond well with the wood and provide a durable finish.
Preparing the Surface
Preparation is key when it comes to using wood filler effectively. Before applying the wood filler, make sure the surface is clean, dry, and free of any loose debris or dust. Sand the area around the imperfection to create a smooth and level surface for the filler to adhere to. If you are working with stained wood, consider matching the color of the wood filler to the wood stain to achieve a seamless blend.
Applying the Wood Filler
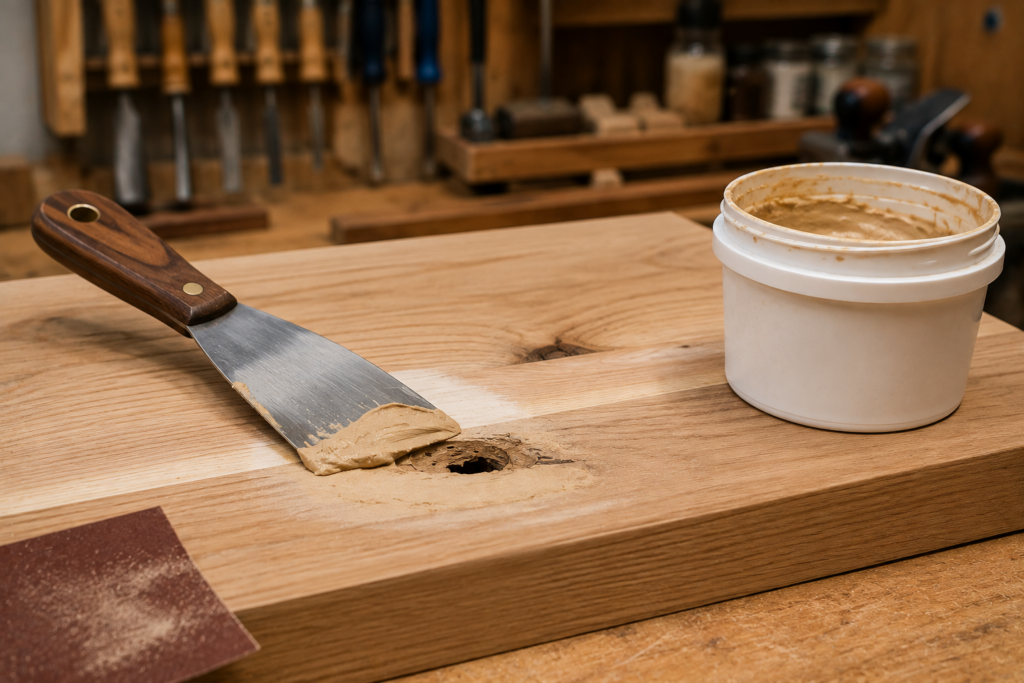
When applying wood filler, use a putty knife or a flexible spatula to press the filler into the imperfection. Fill the gap or hole slightly higher than the surface to account for shrinkage as the filler dries. Smooth out the excess filler using the putty knife, ensuring a level and even finish. If you are working with a large imperfection, consider applying the filler in layers, allowing each layer to dry before applying the next.
Sanding and Finishing
Once the wood filler has dried completely, typically within a few hours, sand the surface to create a smooth and seamless finish. Start with a coarse-grit sandpaper to level the filler with the surrounding wood, then switch to a finer grit sandpaper for a polished finish. If necessary, apply a wood stain or finish over the filled area to match the rest of the woodwork and protect the filler from moisture and wear.
Tips for Success
- Work in a well-ventilated area when using wood filler to avoid inhaling fumes.
- Clean tools immediately after using wood filler to prevent it from hardening on them.
- Test the color of the wood filler on a hidden area before applying it to ensure a seamless match.
By following these tips and techniques for using wood filler like a pro, you can achieve professional results and enhance the overall quality of your woodworking projects. Whether you are repairing furniture, filling nail holes, or creating custom woodwork, mastering the art of using wood filler will elevate your craftsmanship and bring your creations to the next level.