Wooden Corner Shelf: Effortlessly Build Your Best DIY Project
Discover the gratifying journey of bringing your vision to life as you build a wooden corner shelf, creating both a practical and stylish addition to your home. Embrace the joy of craftsmanship and turn that neglected corner into a showcase of your DIY skills with this easy-to-follow guide on how to build a wooden corner shelf.
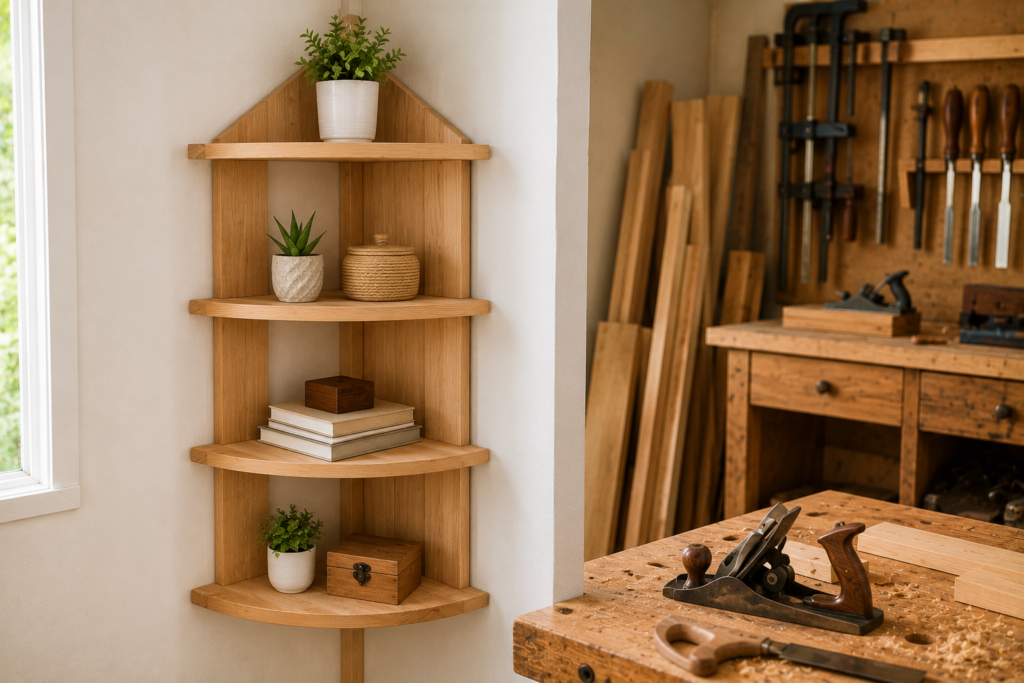
Woodworking enthusiasts and DIY aficionados often find joy and satisfaction in creating functional and decorative pieces for their homes. One popular project that can enhance both the aesthetics and functionality of a space is building a wooden corner shelf. These versatile pieces not only maximize unused corner spaces but also provide a platform to display decor or store essentials. In this guide, we will discuss the steps and tips on how to build a wooden corner shelf to add a touch of craftsmanship to your living space.
Planning Your Wooden Corner Shelf Design
Before you embark on constructing your wooden corner shelf, it’s essential to plan the design and dimensions of the shelf. Consider the size of the corner where the shelf will be placed and determine the height, width, and depth of the shelf based on your needs and the items you plan to display. Sketching out your design on paper can help visualize the final product and ensure accurate measurements.
Selecting the Right Wood for Your Project
Choosing the appropriate type of wood is crucial when building a wooden corner shelf. Opt for a sturdy and visually appealing wood species such as oak, maple, cherry, or pine, depending on your preferences and budget. Ensure that the wood is appropriately treated and free from defects to achieve a professional finish.
Cutting and Sanding the Wood
Once you have selected your wood, it’s time to cut the pieces to size using a saw. Measure and mark the dimensions on the wood before cutting to ensure precision. After cutting the wood, sand the edges and surfaces to create a smooth finish and round off any sharp corners. Sanding also prepares the wood for staining or painting later in the process.
Assembling the Wooden Corner Shelf
Assembling the wooden corner shelf requires joining the individual components together using wood glue and screws. Begin by attaching the sides of the shelf to the back panel, ensuring the pieces are aligned correctly. Use a carpenter’s square to check for right angles and secure the joints with screws. Next, attach the shelf supports to the sides, providing stability and creating the shelves where items can be placed.
Finishing Touches and Personalization
After assembling the basic structure of the wooden corner shelf, you can add finishing touches to enhance its appearance. Apply a wood finish or paint of your choice to protect the wood and complement your home decor style. Consider adding decorative elements such as trim, molding, or routed edges to personalize the shelf and make it unique to your taste.
Installing Your Wooden Corner Shelf
Once your wooden corner shelf is complete, it’s time to install it in the desired corner of your room. Use wall anchors or brackets to securely mount the shelf to the wall, ensuring it can support the weight of the items placed on it. Double-check the shelf’s stability and alignment before arranging your decor or essentials on the shelves.
In conclusion, building a wooden corner shelf is a rewarding DIY project that can elevate the look of your home while providing practical storage solutions. By following the steps outlined in this guide and paying attention to detail, you can create a custom wooden corner shelf that adds character and functionality to any room. Let your creativity shine as you craft a piece of furniture that reflects your woodworking skills and enhances your living space.