Wooden Compost Bin Plans: Easy DIY Guide
Building your own wooden compost bin is a fun and eco-friendly project that will benefit both your garden and the environment. With these easy DIY plans, you can construct a functional composting system that will help you recycle organic waste and enrich your soil with nutrient-rich goodness – all while enjoying the satisfaction of creating something with your own hands.
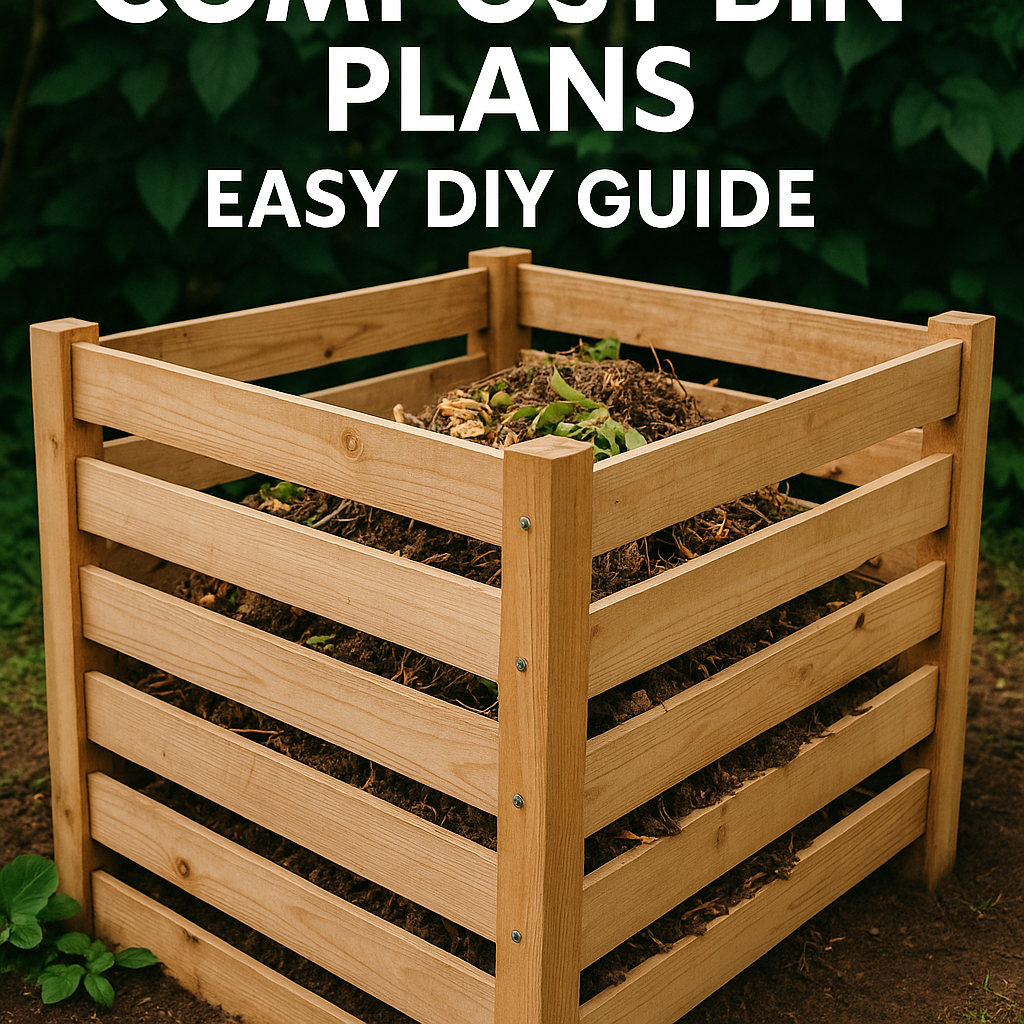
Creating your own DIY wooden compost bin is a rewarding and environmentally friendly project for any backyard enthusiast. Composting is a sustainable way to recycle organic waste and nourish your garden with nutrient-rich soil. In this article, we will explore step-by-step guides and plans to help you build your very own wooden compost bin. Whether you’re a seasoned DIYer or a novice looking to get started, these plans will guide you through the process of constructing a practical and efficient composting system.
Materials and Tools Needed
Before you begin building your wooden compost bin, gather the necessary materials and tools. You will need pressure-treated lumber to withstand outdoor conditions, galvanized screws for durability, a saw for cutting wood to size, a drill for assembling the pieces, and a measuring tape for accuracy. Additionally, consider using a compost bin liner to prevent leakage and aid in the decomposition process.
Building a Simple Wooden Compost Bin
Start by selecting a level area in your backyard or garden to place the compost bin. Begin building the sides of the bin by cutting the lumber to your desired dimensions. A common size for a DIY compost bin is 3 feet by 3 feet, creating a square structure. Assemble the sides of the bin using the screws and drill, ensuring that the corners are sturdy and secure. Leave one side open for easy access to turn and aerate the compost.
Adding Airflow and Drainage
To facilitate proper airflow and drainage in your compost bin, consider adding ventilation holes along the sides or bottom of the structure. These holes will allow oxygen to enter the compost pile, promoting decomposition, and prevent excessive moisture buildup. For improved drainage, elevate the bin slightly off the ground or place it on a base of small rocks to allow excess liquid to flow out.
Maintaining and Turning the Compost
Once your wooden compost bin is assembled, it’s time to start composting. Layer organic materials such as kitchen scraps, yard waste, and shredded paper to create a balanced compost pile. To accelerate decomposition, regularly turn the compost using a pitchfork or shovel to mix the ingredients and aerate the pile. Keep the compost moist but not soggy, and monitor the temperature to ensure optimal conditions for microbial activity.
Troubleshooting and Tips
If you encounter issues such as foul odors, pests, or slow decomposition, here are some troubleshooting tips to consider:
- Adjust the carbon-to-nitrogen ratio by adding more “brown” materials like dried leaves or newspaper.
- Cover food scraps with a layer of “brown” materials to prevent odors and attract fewer pests.
- Monitor the moisture levels and add water if the compost pile appears dry or lacks the necessary moisture for decomposition.
In conclusion, building a DIY wooden compost bin is a practical and eco-friendly way to reduce waste and enrich your garden soil. By following these plans and guidelines, you can create a functional composting system that benefits both your garden and the environment. Embrace the art of composting and enjoy the many benefits of creating nutrient-rich soil for your plants while contributing to a more sustainable lifestyle.