Wooden Window Box Plans: Easy And Simple DIY Guide
Enhance your homes curb appeal with a touch of DIY charm by building your own **wooden window box**. Grow your favorite plants and add a personal touch to your exterior space effortlessly with our easy-to-follow guide.
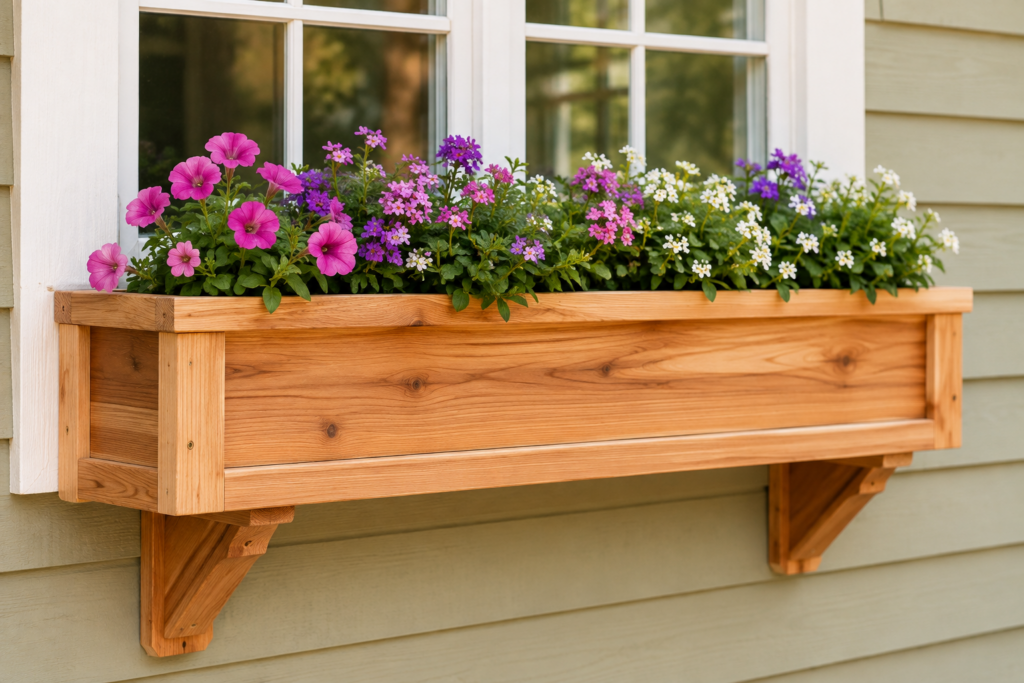
Creating your own DIY wooden window box can be a rewarding and practical project for adding a touch of charm to your home’s exterior. From enhancing the aesthetic appeal of your windows to growing your favorite flowers or herbs, a custom-made wooden window box can bring a sense of warmth and character to your outdoor space with a personal touch. In this article, we will guide you through the process of planning, constructing, and installing your very own DIY wooden window box. Whether you are a seasoned woodworker or a novice DIY enthusiast, these easy-to-follow plans will help you create a beautiful and functional window box that will be the envy of your neighborhood.
Planning Your Wooden Window Box
Before rolling up your sleeves and grabbing your tools, it is crucial to plan your DIY wooden window box carefully. Start by measuring the width of your window and determining the desired length and depth of the box. Consider the type of wood you want to use, such as cedar or redwood, as these are durable and weather-resistant options. Sketching out a design and making a list of materials needed will help you stay organized and focused throughout the project.
Materials and Tools Needed
To bring your DIY wooden window box to life, you will need the following materials and tools:
- Wood boards (cedar, redwood, or other suitable wood)
- Screws or nails
- Drill
- Saw
- Sandpaper
- Wood glue
- Waterproof sealant or paint
Constructing Your Wooden Window Box
Once you have gathered all the necessary materials and tools, it’s time to start constructing your wooden window box. Cut the wood boards to the desired dimensions based on your measurements. Assemble the box by attaching the sides to the front and back panels using screws or nails. Reinforce the corners with wood glue for added strength. Sand down any rough edges and apply a waterproof sealant or paint to protect the wood from moisture and weathering.
Installing Your Window Box
After completing the construction, it’s time to install your DIY wooden window box. Position the box below your window, ensuring it is level and securely attached to the exterior of your home. Use brackets or mounting hardware to support the weight of the box and prevent it from sagging. Add a layer of gravel or pebbles to the bottom of the box for drainage before filling it with potting soil and your favorite plants.
Maintaining Your Wooden Window Box
To keep your DIY wooden window box looking its best, regular maintenance is essential. Water your plants as needed, taking care not to overwater or let the soil become too dry. Inspect the box for any signs of wear or damage, and reapply a waterproof sealant as necessary to protect the wood from the elements. With proper care and attention, your wooden window box will continue to enhance the beauty of your home for years to come.
Building your own DIY wooden window box is a fun and creative way to add a personal touch to your home’s exterior. By following these simple plans and steps, you can create a beautiful and functional window box that will brighten up your surroundings and showcase your green thumb. Whether you are a seasoned DIY enthusiast or just starting out, this project offers a rewarding experience that you can enjoy for years to come. So, gather your materials, unleash your creativity, and get ready to elevate your curb appeal with a stunning wooden window box crafted by your own hands.
Want More Woodworking Projects?
If you enjoyed building this wooden window box, there are plenty of other woodworking projects you can try next. From simple beginner projects to more detailed furniture and outdoor builds, having a collection of clear, step-by-step plans can make your next project much easier.
If you’re looking for more ideas and detailed woodworking plans, check out Ted’s Woodworking. It features a large collection of woodworking plans covering a wide range of projects, making it a useful resource for anyone who wants to build more projects with wood.
Explore More Woodworking Plans with Ted’s Woodworking –> tedplansdiy.com