DIY Wall-Mounted Lumber Rack for Small Shops
Maximize your small shop space with a DIY wall-mounted lumber rack! Effortlessly store your lumber, free up valuable floor space, and easily access your materials for every project.
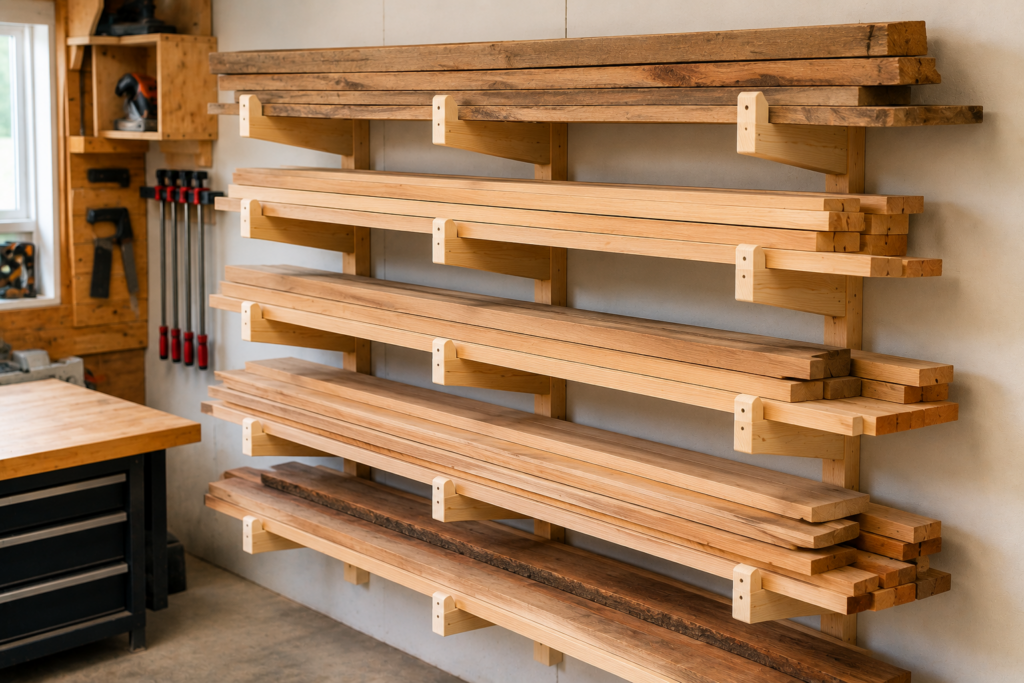
Creating a functional and organized workspace is essential, especially for small shops where space is limited. A DIY wall-mounted lumber rack can be the perfect solution to maximize vertical storage and keep your lumber neatly organized. In this article, we will explore the benefits of a wall-mounted lumber rack, provide step-by-step instructions on how to build one, and offer tips for optimizing your small shop’s storage capacity.
Benefits of a Wall-Mounted Lumber Rack
A wall-mounted lumber rack offers several advantages for small shop owners. Firstly, it helps free up valuable floor space by utilizing the often underutilized vertical space on your walls. This means you can store your lumber in a convenient, easy-to-access location without cluttering up your work area. Additionally, a well-organized lumber rack can improve efficiency by allowing you to quickly locate and select the right piece of wood for your project, saving you time and minimizing frustration.
Step-by-Step Guide to Building a Wall-Mounted Lumber Rack
Building your own wall-mounted lumber rack is a relatively straightforward project that can be completed over a weekend with basic tools and materials. Here is a step-by-step guide to help you create a custom lumber rack for your small shop:
-
Measure and Plan: Start by measuring the available wall space where you want to install the lumber rack. Consider the length and thickness of the lumber you typically work with to determine the dimensions of your rack.
-
Gather Materials: Purchase sturdy metal brackets, wooden boards, screws, and a stud finder from your local hardware store. Opt for materials that can support the weight of your lumber collection.
-
Install Brackets: Use a stud finder to locate the wall studs where you will mount the brackets. Secure the brackets to the wall at equal distances apart, ensuring they are level and securely attached.
-
Attach Wood Boards: Place the wooden boards across the brackets, ensuring they are evenly spaced and secure them in place with screws. You can adjust the spacing between the boards to accommodate different sizes of lumber.
-
Organize Your Lumber: Once the rack is securely installed, arrange your lumber on the shelves by size, type, or project, making it easy to find what you need when you need it.
Tips for Optimizing Small Shop Storage
-
Utilize Vertical Space: In small shops, vertical storage is key. Consider installing additional wall-mounted racks for tools, hardware, and other supplies to free up floor space.
-
Label and Categorize: Keep your shop organized by labeling shelves, bins, and drawers with the contents they hold. Categorize items by type or project to make it easier to find what you need.
-
Invest in Multi-Functional Furniture: Choose furniture pieces that offer storage solutions, such as workbenches with built-in shelving or drawers, to maximize your shop’s storage capacity.
A DIY wall-mounted lumber rack is a practical and cost-effective solution for small shop owners looking to optimize their workspace. By following the step-by-step guide provided and implementing storage optimization tips, you can create a well-organized and efficient shop that enhances your productivity and enjoyment of woodworking projects.